To start off, you need some good, fresh-pressed cider. Blends of apples work well, or, 'Liberty' alone makes a fine cider. This particular batch was a blend of 'Liberty' and 'Haralson' (a locally popular apple in Minnesota). Best bet is to press fully ripe fruit, that have been picked and let 'mellow' for 7-10 days under cool, shaded cover. Remember to keep everything clean during the process to assure a quality cider!
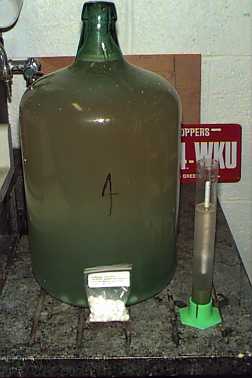
Once the cider has been pressed and placed in a glass 'carboy' or similar container (in this case, five gallons), then using a hydrometer (the green-bottomed cylinder), the specific gravity of the cider is measured. Sugar, and other fermentable solids add to the density of water, raising the specific gravity. As fermentation takes place, solids are converted to alcohol, lowering specific gravity. Therefore, an initial gravity reading (O.G., for Original Gravity) gives an estimate of final alcohol content. Here, our O.G. was app. 1040, corresponding (from chart supplied with hydrometer) to a final alcohol content of 5.5% -- just about right for hard cider. If a higher final alcohol content was desired, sugar could have been added to the fresh cider.
Campden's tablets (sodium meta-bisulfite) are added to the cider (one tablet, crumbled, per gallon) to kill natural yeasts, which could result in 'off-flavored ' cider. Keep the cider covered.
Wait 48 hours after adding the Campden's tablets before adding yeast and starting fermentation. Champagne yeast gives good results, however, for a traditional English cider, use an ale-type yeast. Follow the instructions on the yeast package for mixing instructions and fermenting temperature. Here, one package of champagne yeast was mixed with a few ounces of cider, then added to the carboy.

Fermentation, took place at room temperature (app. 70 F.). The carboy was loosely covered for a few days when fermentation was starting in earnest. There will be some overflow, so plan for it. Then, an airlock was placed on the carboy for the remainder of the fermentation (plastic airlocks are readily available at home-brew stores, remember to fill with water to form the 'lock'). Fermentation lasted about three weeks, and pretty much stopped altogether when it was done -- you'll know. I've had some batches of cider take much longer, and were much more gradual to stop fermenting! At this point, the specific gravity should be measured again -- if fermentation is complete, then the final gravity (F.G.) will be 1000, indicating all the sugar has been converted to alcohol. The cider was left to settle for several weeks before 'racking-off' into glass bottles. Wine corks were used to seal the bottles. Some will say the cider needs to be further aged, however, it's pretty hard to resist having a glass at this point -- so enjoy!
All the supplies mentioned here are readily available (and modestly priced) at home-brew shops.
For further reading, I recommend 'Making Cider,' by Jo Deal (ISBN 0 90084145 1)